Why do we need adaptive brightness control?
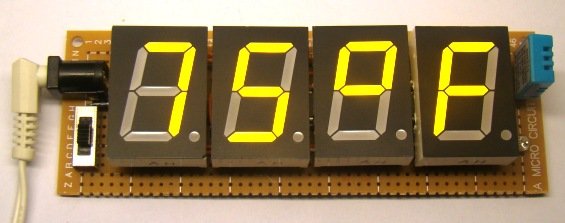
Auto-adjusting the brightness of the seven segment LED displays not only saves power but also enhances the readability in all ambient lighting conditions. Many smartphones, HDTVs, PDAs, tablets, and computer screens now come with this feature. It basically dims the display in a dark environment and is still readable and eye-soothing. Similarly, when the ambient light level goes up, it brightens the display to enhance the readability. This project displays indoor temperature and relative humidity on large 1 inch seven segment LEDs that automatically adjust the brightness to be in balance with the light condition in the room. So, if you put this meter in your bedroom, you won’t have to worry about turning it off during nighttime. It will automatically dim low enough to not to disturb your sleep, while maintaining the readability.
Circuit diagram
To make it easy to explain, I have divided the complete circuit diagram into 3 parts: Power supply unit, Microcontroller and sensor unit, and Display driver unit.
The power supply unit consists of a LM7805 regulator IC to derive regulated +5V power supply from a 9-15V DC wall adapter. The complete power supply unit circuit diagram is shown below. LED1 is a power-on indicator LED.
– See more at: http://embedded-lab.com/blog/?p=6582#sthash.ICwZff85.dpuf
The following circuit diagram shows connections of the DHT11 sensor and the photoresistor (also called light dependent resistor or LDR) to the PIC16F688 microcontroller. DHT11 is a low cost digital sensor for measuring temperature from 0-50 °C with an accuracy of ±2°C and relative humidity ranging from 20-95% with an accuracy of ±5%. The sensor provides fully calibrated digital outputs and has got its own proprietary 1-wire protocol for communication. I have described more about this sensor and its communication protocol in Measurement of temperature and relative humidity using DHT11 sensor and PIC microcontroller. The PIC16F688 uses the RC4 I/O pin to read the DHT11 output data. Note that R7 serves as the pull-up resistor required for the data pin of the DHT11 sensor. The S2 switch in the circuit diagram is to select between degree Fahrenheit (°F) and degree Celsius (°C) unit for temperature display. When the switch is open, the RC3 pin is pulled low by default, and the temperature is displayed in °F scale. In order to chose °C scale, the RC3 pin should be pulled high, which happens when S2 is closed.
Next, the photoresistor (R5) and R4 construct a voltage divider network as shown in the circuit. The analog voltage across R4 increases proportionally with the amount of light falling on the photoresistor. The resistance of a typical photoresistor is less than 1 K? under bright lighting condition. Its resistance could go up to several hundred K? under extremely dark condition. Therefore, for the given setup, the voltage across the R4 resistor can vary from less than 0.1V (under dark condition) to over 4.0V (under very bright illumination). The PIC16F688 microcontroller reads this analog voltage through its AN2 (RA2) ADC channel to determine the surrounding illumination level.
– See more at: http://embedded-lab.com/blog/?p=6582#sthash.ICwZff85.dpuf

Software
The PIC firmware is developed in C and compiled with mikroC Pro for PIC compiler version 5.30. The subroutines for initializing the MAX7219 and sending display data bytes are written in a simple and understandable way so that they can be easily implemented with any other programming language, if required. The MAX7219 allows display brightness to be controlled through software by an internal pulse-width modulator (PWM). The PWM output is controlled by the lower nibble (D3-D0) of the intensity register (address 0x0A) and allows 16 brightness levels. The zero nibble value sets the display intensity to minimum, whereas all nibble bits set to 1 (0x0F) selects the maximum intensity level for the display. For auto-brightness control, the 10-bit ADC count (0-1023) corresponding to the photoresistor output voltage is scaled down to 0-19 by dividing the count by 50 (20 brightness levels between 0-1023). Then a look-up table is used to map the scaled brightness levels to appropriate nibble values for the intensity control register of the MAX7219. The temperature is displayed in Fahrenheit (°F) scale if RC3 is pulled low, and in Celsius (°C) scale if RC3 is high. The relative humidity measurement is shown in percentage (P). The microcontroller alternately switches the display data between temperature and relative humidity.
For more detail: TrH Meter: A DIY indoor thermometer plus hygrometer with adaptive brightness control implemented to 7-segment LED displays
The post TrH Meter: A DIY indoor thermometer plus hygrometer with adaptive brightness control implemented to 7-segment LED displays appeared first on PIC Microcontroller.